
Share
Field Sales teams rely on Salesforce Maps for effective route planning and on-site activity tracking. Among its many features, the Check-In and Check-Out actions allow users to log their visits and ensure accountability for the sales team. While the standard functionality serves as a great starting point, Salesforce Maps also offers the flexibility to tailor these actions to specific business needs.
This blog will guide you through:
- The standard Check-In and Check-Out functionality and its limitations.
- Step-by-step instructions for customizing these processes to better suit your organization.
- An example of a customized solution, showcasing dynamic features and enhanced workflows.
- The benefits of customization, and how they can improve your field operations.
By the end, you’ll see how customizing these actions can unlock Salesforce Maps’ full potential and empower your field teams.
Understanding the Standard Check-In and Check-Out Functionality
Salesforce Maps includes default Check-In and Check-Out actions that allow users to log visit details during field operations. These actions track visits, capture key information, and automatically create Tasks in Salesforce.
The Check-In action is straightforward: it records that a user has arrived at a location. After completing the Check-In, the Check-Out action becomes available, allowing users to log more detailed visit information.
Configuring the Standard Check-Out Process
Admins can customize the fields displayed during the Check-Out process using the Custom Disposition field set. Here’s how:
- Create a Field Set:
- Navigate to the Task Object in Salesforce Setup, select Field Sets, and click New to create a field set for Salesforce Maps.
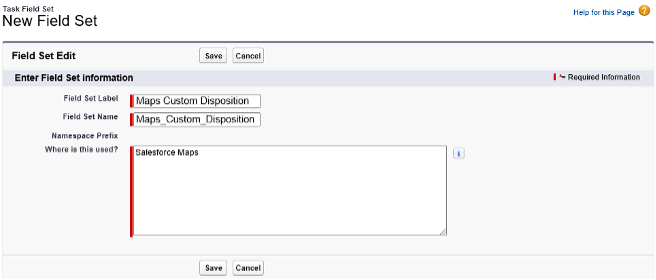
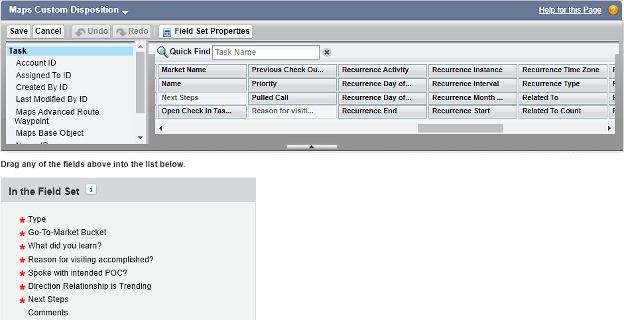
- Define Fields:
- Drag and drop fields such as Comments, Call Result, or Next Steps into the field set to make them available during Check-Out.
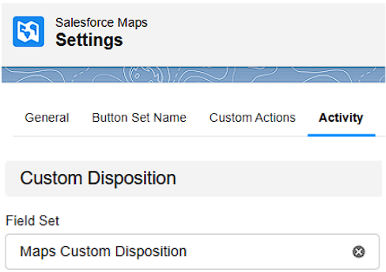
- Assign the Field Set:
- In Salesforce Maps settings, select the newly created field set in the Custom Disposition settings.
By using this setup, businesses can ensure that the standard Check-Out process captures the most relevant details for their field operations.
How It Works (Step-by-Step):
- Accessing the Location:
- Users open Salesforce Maps, select a location pin on the map or a record from the list view.
- Using the Actions Menu:
- The Actions Menu displays available actions for the selected location.
- Initially, the Check-In action is visible.
- After completing a Check-In, it disappears, and the Check-Out action becomes available.
- Performing a Check-Out:
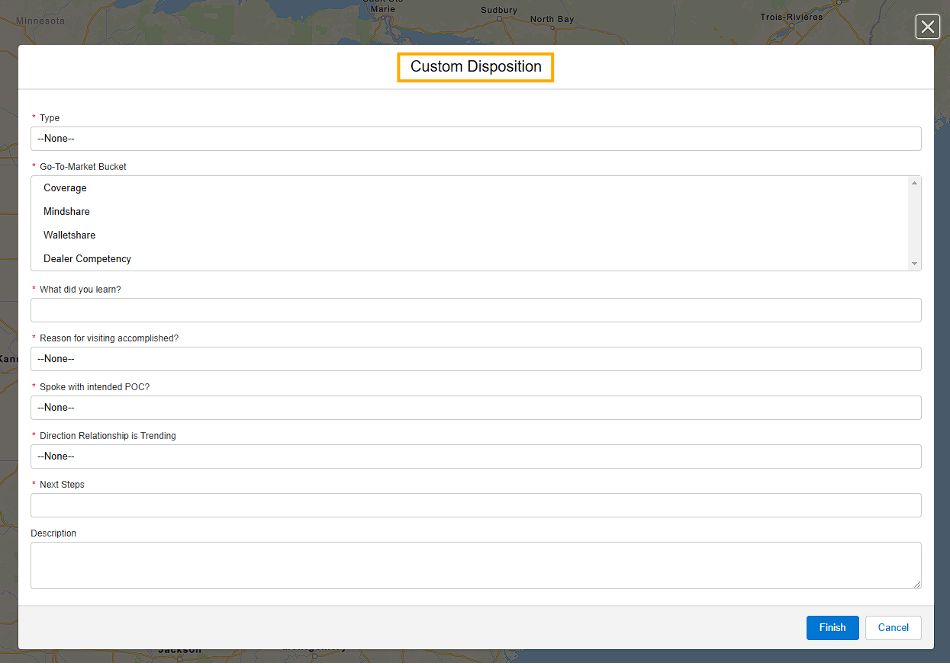
- Clicking Check-Out opens the Custom Disposition Form, where users provide details such as:
- Reason for Visiting Accomplished?
- What Did You Learn?
- Next Steps
- The user completes the form and clicks Finish, logging the visit.
- Clicking Check-Out opens the Custom Disposition Form, where users provide details such as:
- Task Creation:
- Each completed Check-In or Check-Out automatically creates a Salesforce Task linked to the appropriate record, capturing all logged details.
Limitations of the Standard Setup:
- Static Fields Only: The field set limits customization to predefined fields, offering no dynamic content.
- No Contextual Alerts: It cannot display alerts or contextual guidance specific to the account or visit.
- Limited Record Management: Users cannot create or link additional records, such as associating multiple contacts with a Task.
Customizing the Check-In and Check-Out Processes
To overcome these limitations, Salesforce Maps allows for custom actions, which can launch tailored processes for dynamic content and advanced workflows. Here’s how to customize the Check-In and Check-Out processes step by step:
Step 1: Setting Up Custom Actions
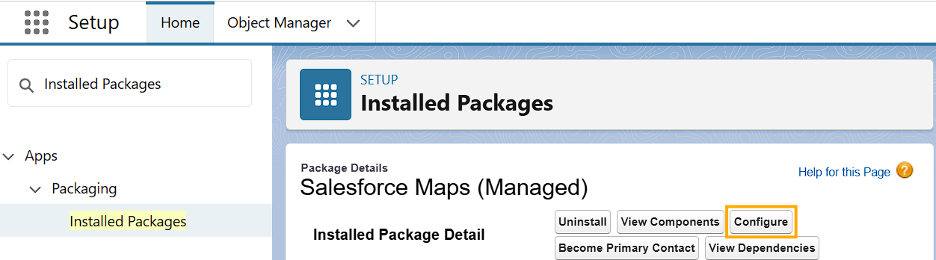
Start by navigating to Setup in Salesforce and selecting Installed Packages. Locate the Salesforce Maps package and click Configure to access the settings.
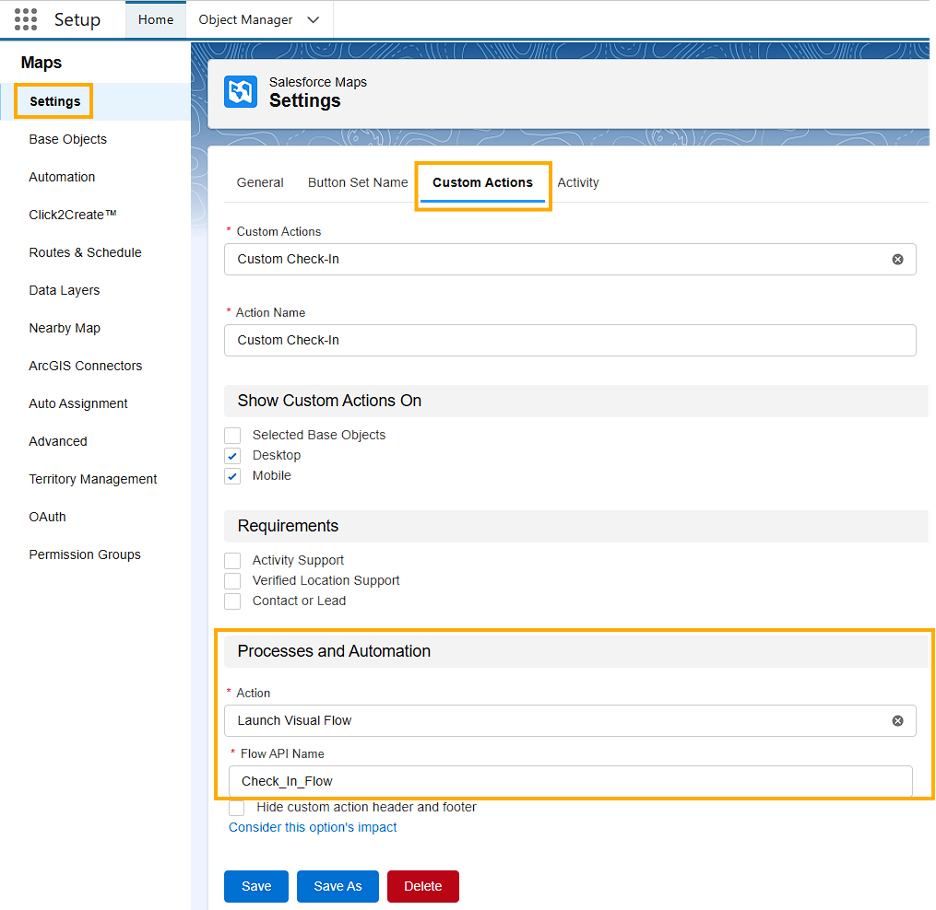
Once inside the Salesforce Maps settings, create Custom Check-In and Custom Check-Out actions under the Custom Actions tab. These actions will launch tailored processes to enable dynamic content, alerts, and advanced workflows.
Step 2: Creating a Custom Button Set
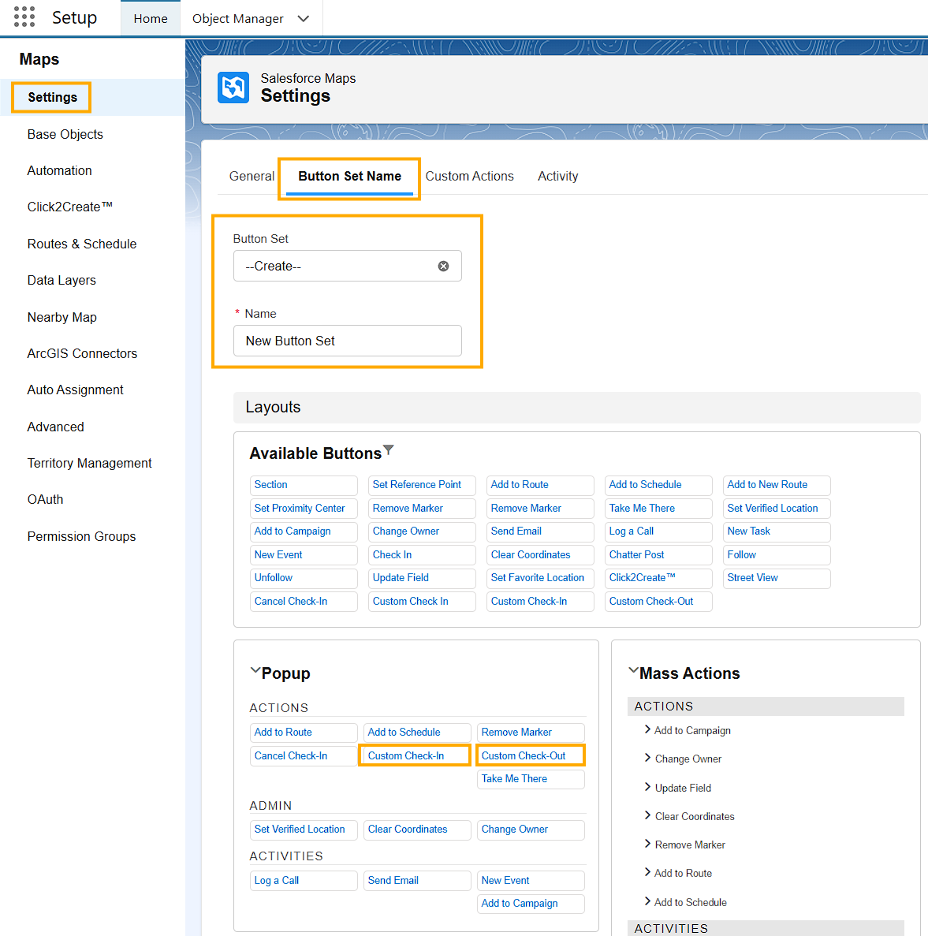
Once the custom actions are created, add them to a Button Set and assign the button set to the Popup Layout. This ensures the actions are available to users in the Salesforce Maps interface.

Step 3: Adding the Button Set to a Permission Group
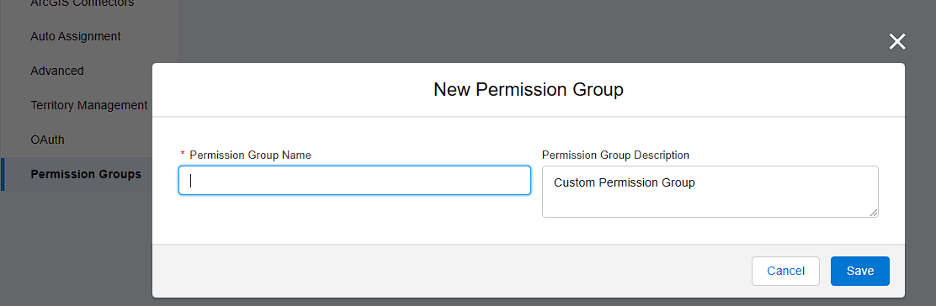
To control visibility, create a Permission Group and add the button set to it. Assign this permission group to the appropriate profiles so users with the right access can see and use the buttons.

Example of a Customized Solution
Below, we provide an example of how a customized Check-In and Check-Out solution might look. This example highlights how tailored configurations can meet specific business requirements.
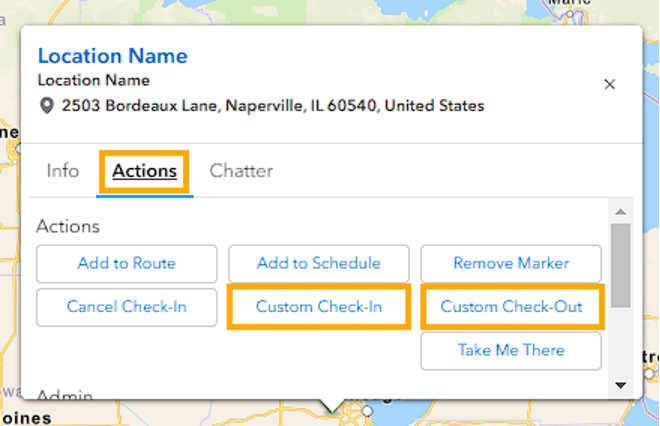
Actions Menu Integration
In this example, the custom Check-In and Check-Out buttons are seamlessly integrated into the Salesforce Maps Actions Menu, accessible on both desktop and mobile. This menu provides users with quick access to the customized features, ensuring efficient workflows during field operations.
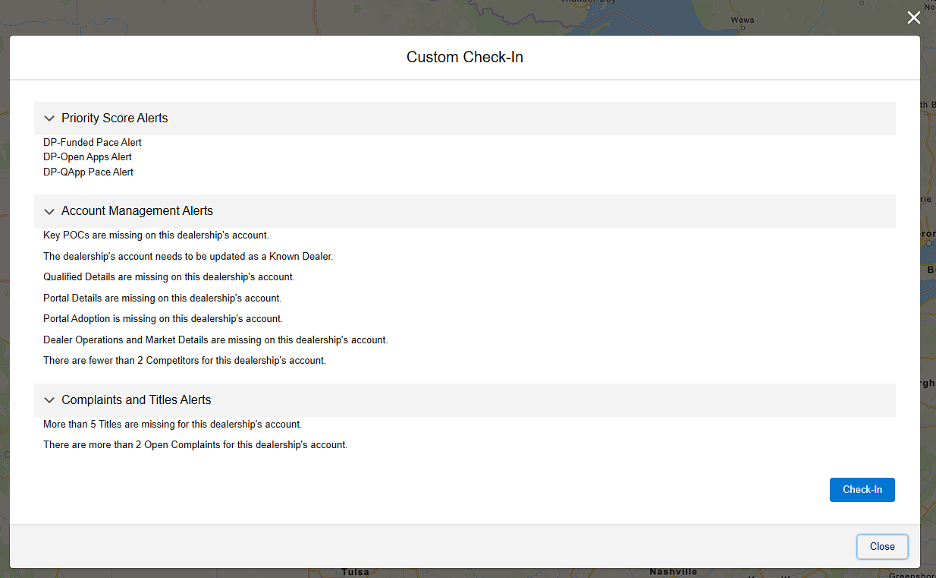
Custom Check-In Features
The custom Check-In process is designed with dynamic sections and messaging tailored to a specific business use case. In this example:
- Dynamic Sections and Messaging: The Check-In process displays categorized alerts, such as Priority Score Alerts, Account Management Alerts, and Complaints and Titles Alerts, providing actionable insights before engaging with a customer. These alerts are specific to this use case but can be customized based on your business requirements.
- Customizable Content and Data Capture: The process goes beyond static fields by incorporating content such as visit-specific guidance or data capture tailored to the account, region, or workflow. These configurations are flexible and can be adapted to meet different business needs.
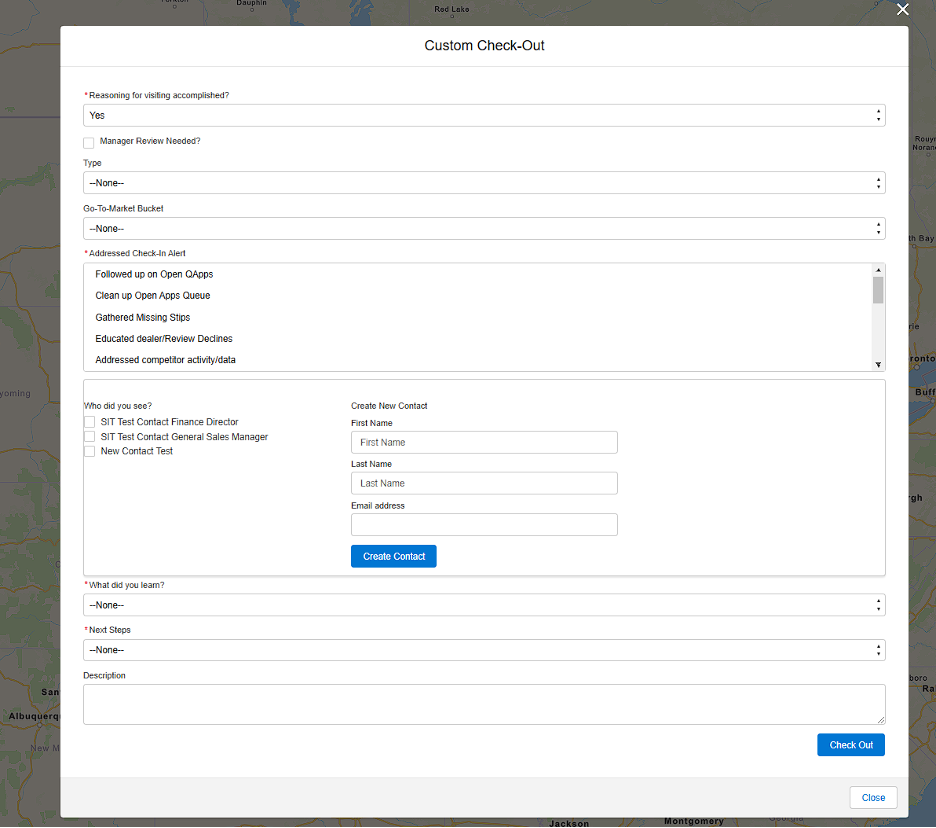
Custom Check-Out Features
The custom Check-Out process in this example demonstrates how businesses can manage data dynamically during field operations. Key features include:
- Contact Management:
- Select existing contacts related to the account.
- Create new contacts directly within the Check-Out process.
- Associate both new and existing contacts with the Task created during Check-Out.
- Dynamic Fields and Contextual Guidance:
- The process incorporates custom picklists, reminders, and instructions to ensure all necessary details are captured during Check-Out.
- Enhanced Task Management:
- Tasks created during Check-Out are enriched with multiple record associations, detailed notes, and next steps to improve follow-up efficiency and data quality. These features reflect the specific requirements of this use case but can be configured differently for other scenarios.
Benefits of Customizing Check-In and Check-Out
- Dynamic and Flexible Workflows: Custom actions and tailored processes allow for experiences that adapt to specific business needs.
- Improved User Experience: Launching tailored processes ensures a more intuitive and interactive interface for field representatives.
- Enhanced Data Accuracy: Custom workflows ensure that critical data, such as contact associations and visit details, are captured accurately.
- Scalability: This approach can easily be extended to support future requirements or more complex workflows.
Conclusion
Salesforce Maps’ default Check-In and Check-Out functionality provides a solid foundation, but customizations unlock its full potential. The example shared in this blog demonstrates how businesses can adapt Salesforce Maps to address specific workflows, improve field team productivity, and enhance data accuracy. Whether you need similar functionality or a completely unique setup, Salesforce Maps’ flexibility makes it a valuable tool for your organization.
Ready to explore customizations tailored to your needs? Contact Solving IT (sales@solvingit.com) today and let us help you create a solution that works for you.