
Share
Overview
If you’ve ever found yourself toggling between Salesforce and JIRA while trying to manage customer issues, you’re not alone. Support teams live in Salesforce. Dev teams live in JIRA. Customers don’t care where the work happens—just that it gets done.
That’s where a Salesforce-JIRA integration comes in. This blog post will walk you through how connecting these two systems can streamline your Case management process, reduce miscommunication, and give your teams a shared source of truth. Whether you’re in customer support, product, or engineering, this integration can improve collaboration and speed up issue resolution.
We’ll cover:
- What the integration does and how it works
- Key features and use cases
- Basic configuration steps
- Why it’s worth your time
What Does a Salesforce–JIRA Integration Do?
At its core, this integration lets Salesforce users create, view, and sync JIRA issues directly from a Case record. This means support agents don’t have to switch tabs or chase down dev updates—they can see issue status right within Salesforce.
Here are a few things this setup typically enables:
- Case-to-Issue Creation: Create a new JIRA ticket from a Case with just a click.
- Two-Way Sync: Key fields like status, priority, or comments can sync between systems.
- Visibility: Support can view JIRA issue history, resolution notes, and progress without logging in to JIRA.
- Custom Mapping: Field-level control over what gets passed between systems.
Key Features & Use Cases
| Feature | How It Helps |
|---|---|
| Automated JIRA Issue Creation | Link bugs and feature requests directly to support Cases. |
| Status Sync | Automatically update Salesforce Cases as issues progress in JIRA. |
| Comment Sharing | Keep internal and external stakeholders in the loop without duplicating updates. |
| Priority Matching | Ensure critical issues in Salesforce are reflected in JIRA’s priority queues. |
| Error Reduction | Eliminate copy/paste errors from manual updates across systems. |
This setup is especially useful if your company has:
- A dedicated engineering team working on bugs or enhancements
- A customer-facing team managing support in Salesforce
- Frustration from duplicate data entry or lost communication between teams
How to Configure the Integration
There are several ways to set this up, depending on your budget and technical preference:
1. Use an AppExchange App
This is the easiest and most common option, and Atlassian (JIRA’s parent company) has their own app that is easy to use here.
- Step 1: Find a pre-built integration tool on the AppExchange.
- Step 2: Install it in your Salesforce org and follow the setup wizard.
- Step 3: Authenticate your JIRA instance and define mappings (Case → Issue, Status, Priority, etc.).
- Step 4: Customize triggers—when should an issue be created or updated?
- Step 5: Test it end-to-end before rolling it out.
2. Build a Custom Integration (Using APIs)
If your needs are highly specific, or you’re using JIRA Data Center/Server instead of Cloud, you might go the custom route.
- Leverage Salesforce’s REST API and JIRA’s REST API to send data back and forth.
- Create Apex triggers or Flows to initiate updates.
- Use middleware like MuleSoft or Boomi to manage complex logic or data transformation.
Diving into the Features
Once integrated, there are several features that are typically super easy to set up. These features work together to provide a 360-view of the JIRA Issues within a Salesforce.
Associate or Create JIRA Issues Directly from a Case
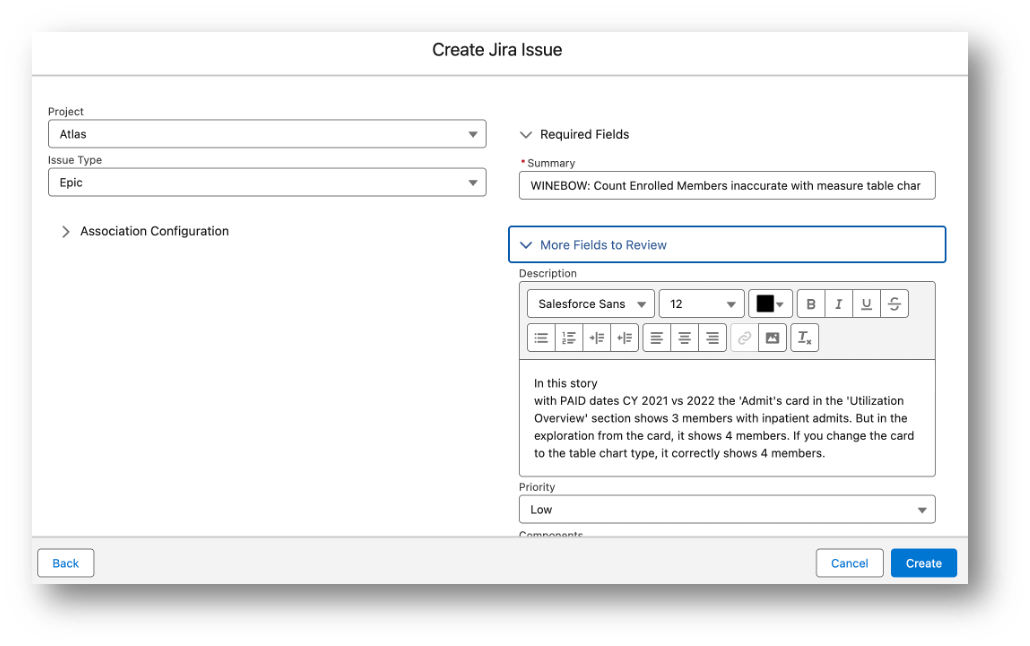
With just a click (or an automation), support agents can:
- Create a new JIRA issue straight from a Case record
- Associate an existing JIRA issue if a similar bug or request is already being tracked
- Avoid duplicate tickets in JIRA by linking to what’s already there
This cuts down on redundant work and keeps devs focused.
View a List of Related JIRA Issues on the Case Record
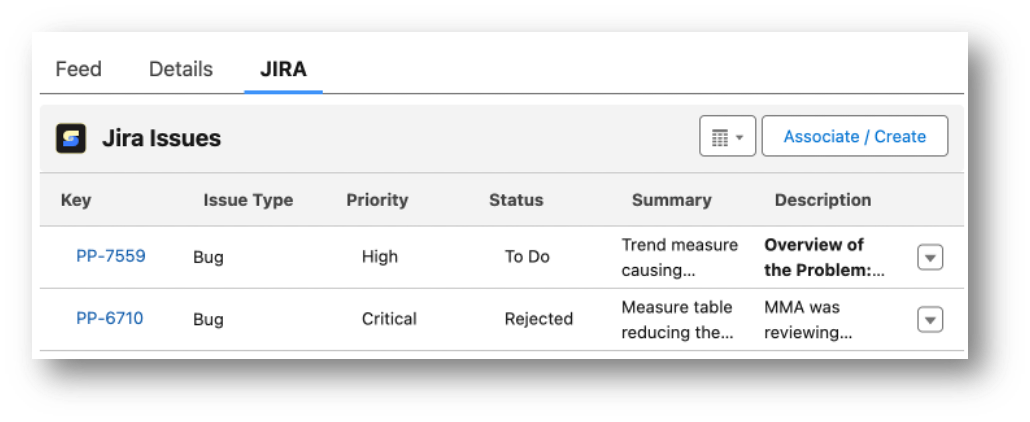
Most integrations let you display a related list or embedded table of all JIRA issues tied to a single Case. You can see:
- Key
- Issue Type
- Priority
- Status
- Summary
- Description
No need to hunt through JIRA—agents get a real-time view of progress directly in Salesforce.
Pro Tip: You can connect multiple JIRA Issues to a single Case with most integrations.
Sync JIRA Comments to the Case
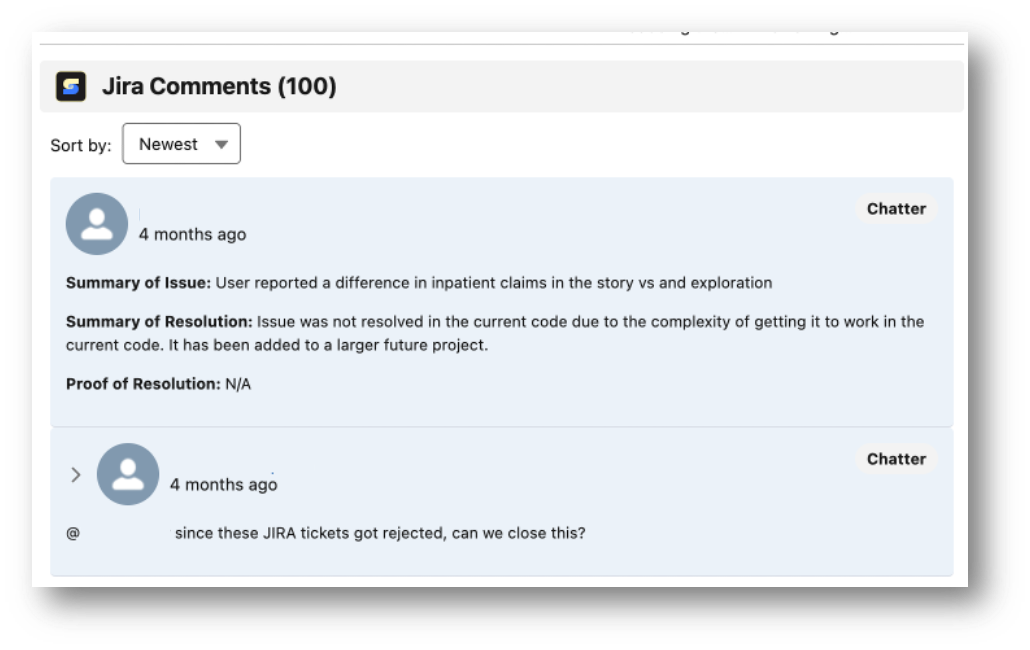
When engineers add internal notes or updates to a JIRA issue, those comments can be synced to the Case in Salesforce—either as:
- Private/internal comments (for agent eyes only)
- Public-facing comments (that can be shared with customers)
This allows support teams to provide timely, accurate updates without ever logging into JIRA. It also creates a full audit trail of the issue’s lifecycle right on the Case.
Conclusion
Connecting JIRA to Salesforce isn’t just a nice-to-have—it’s a powerful way to align your customer support and product teams. With the right setup, you’ll reduce friction, close feedback loops, and keep everyone on the same page.
Whether you use an AppExchange solution or roll your own, it’s worth investing the time to get this right. Your customers—and your team—will thank you.
Ready to transform Service Cloud? Let us help you take your service workflow to the next level! Contact sales@solvingit.com to request more information.
Image by Kampus Production